Sometimes they are called “Sticky Buns.”
Make your easy bread dough with small variations. I doubled the recipe and added a bit more butter and two eggs to the dough. That seems to make it lighter. I’ll put the recipe at the end.
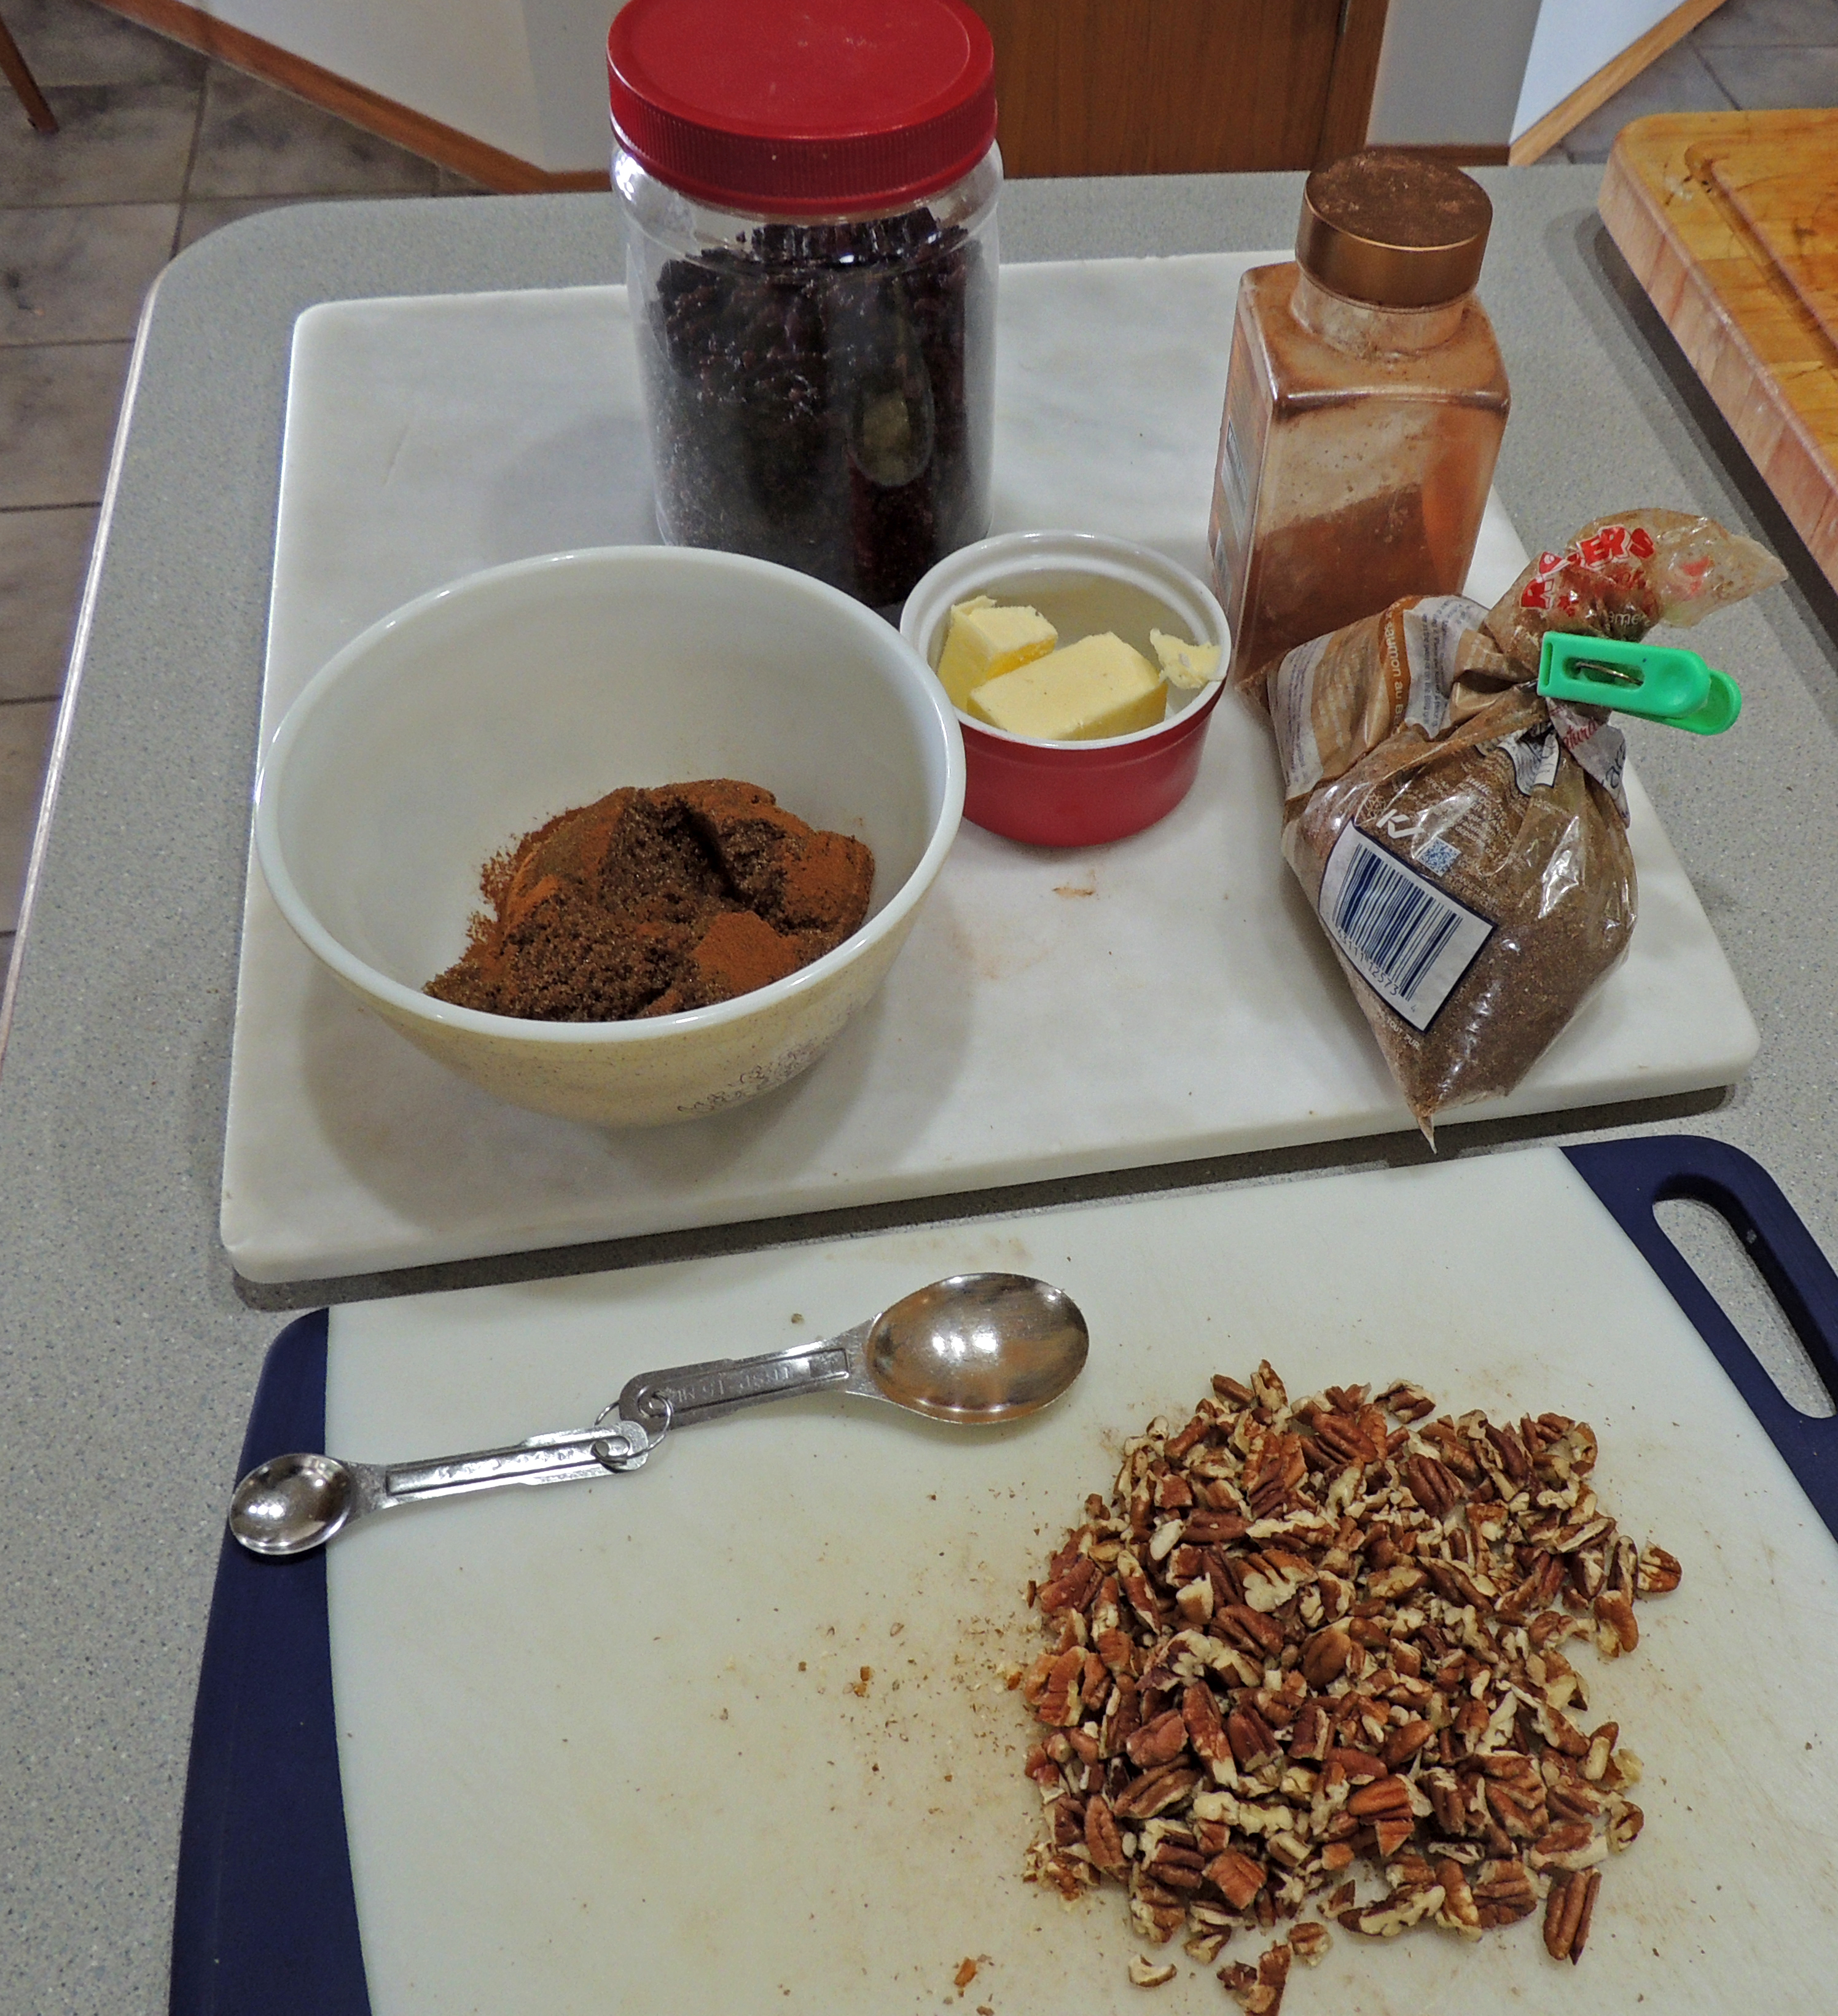
You’ll need the ingredients shown in the photo below:
Cinnamon, butter, brown sugar, raisins (or currants), pecans (or walnuts).
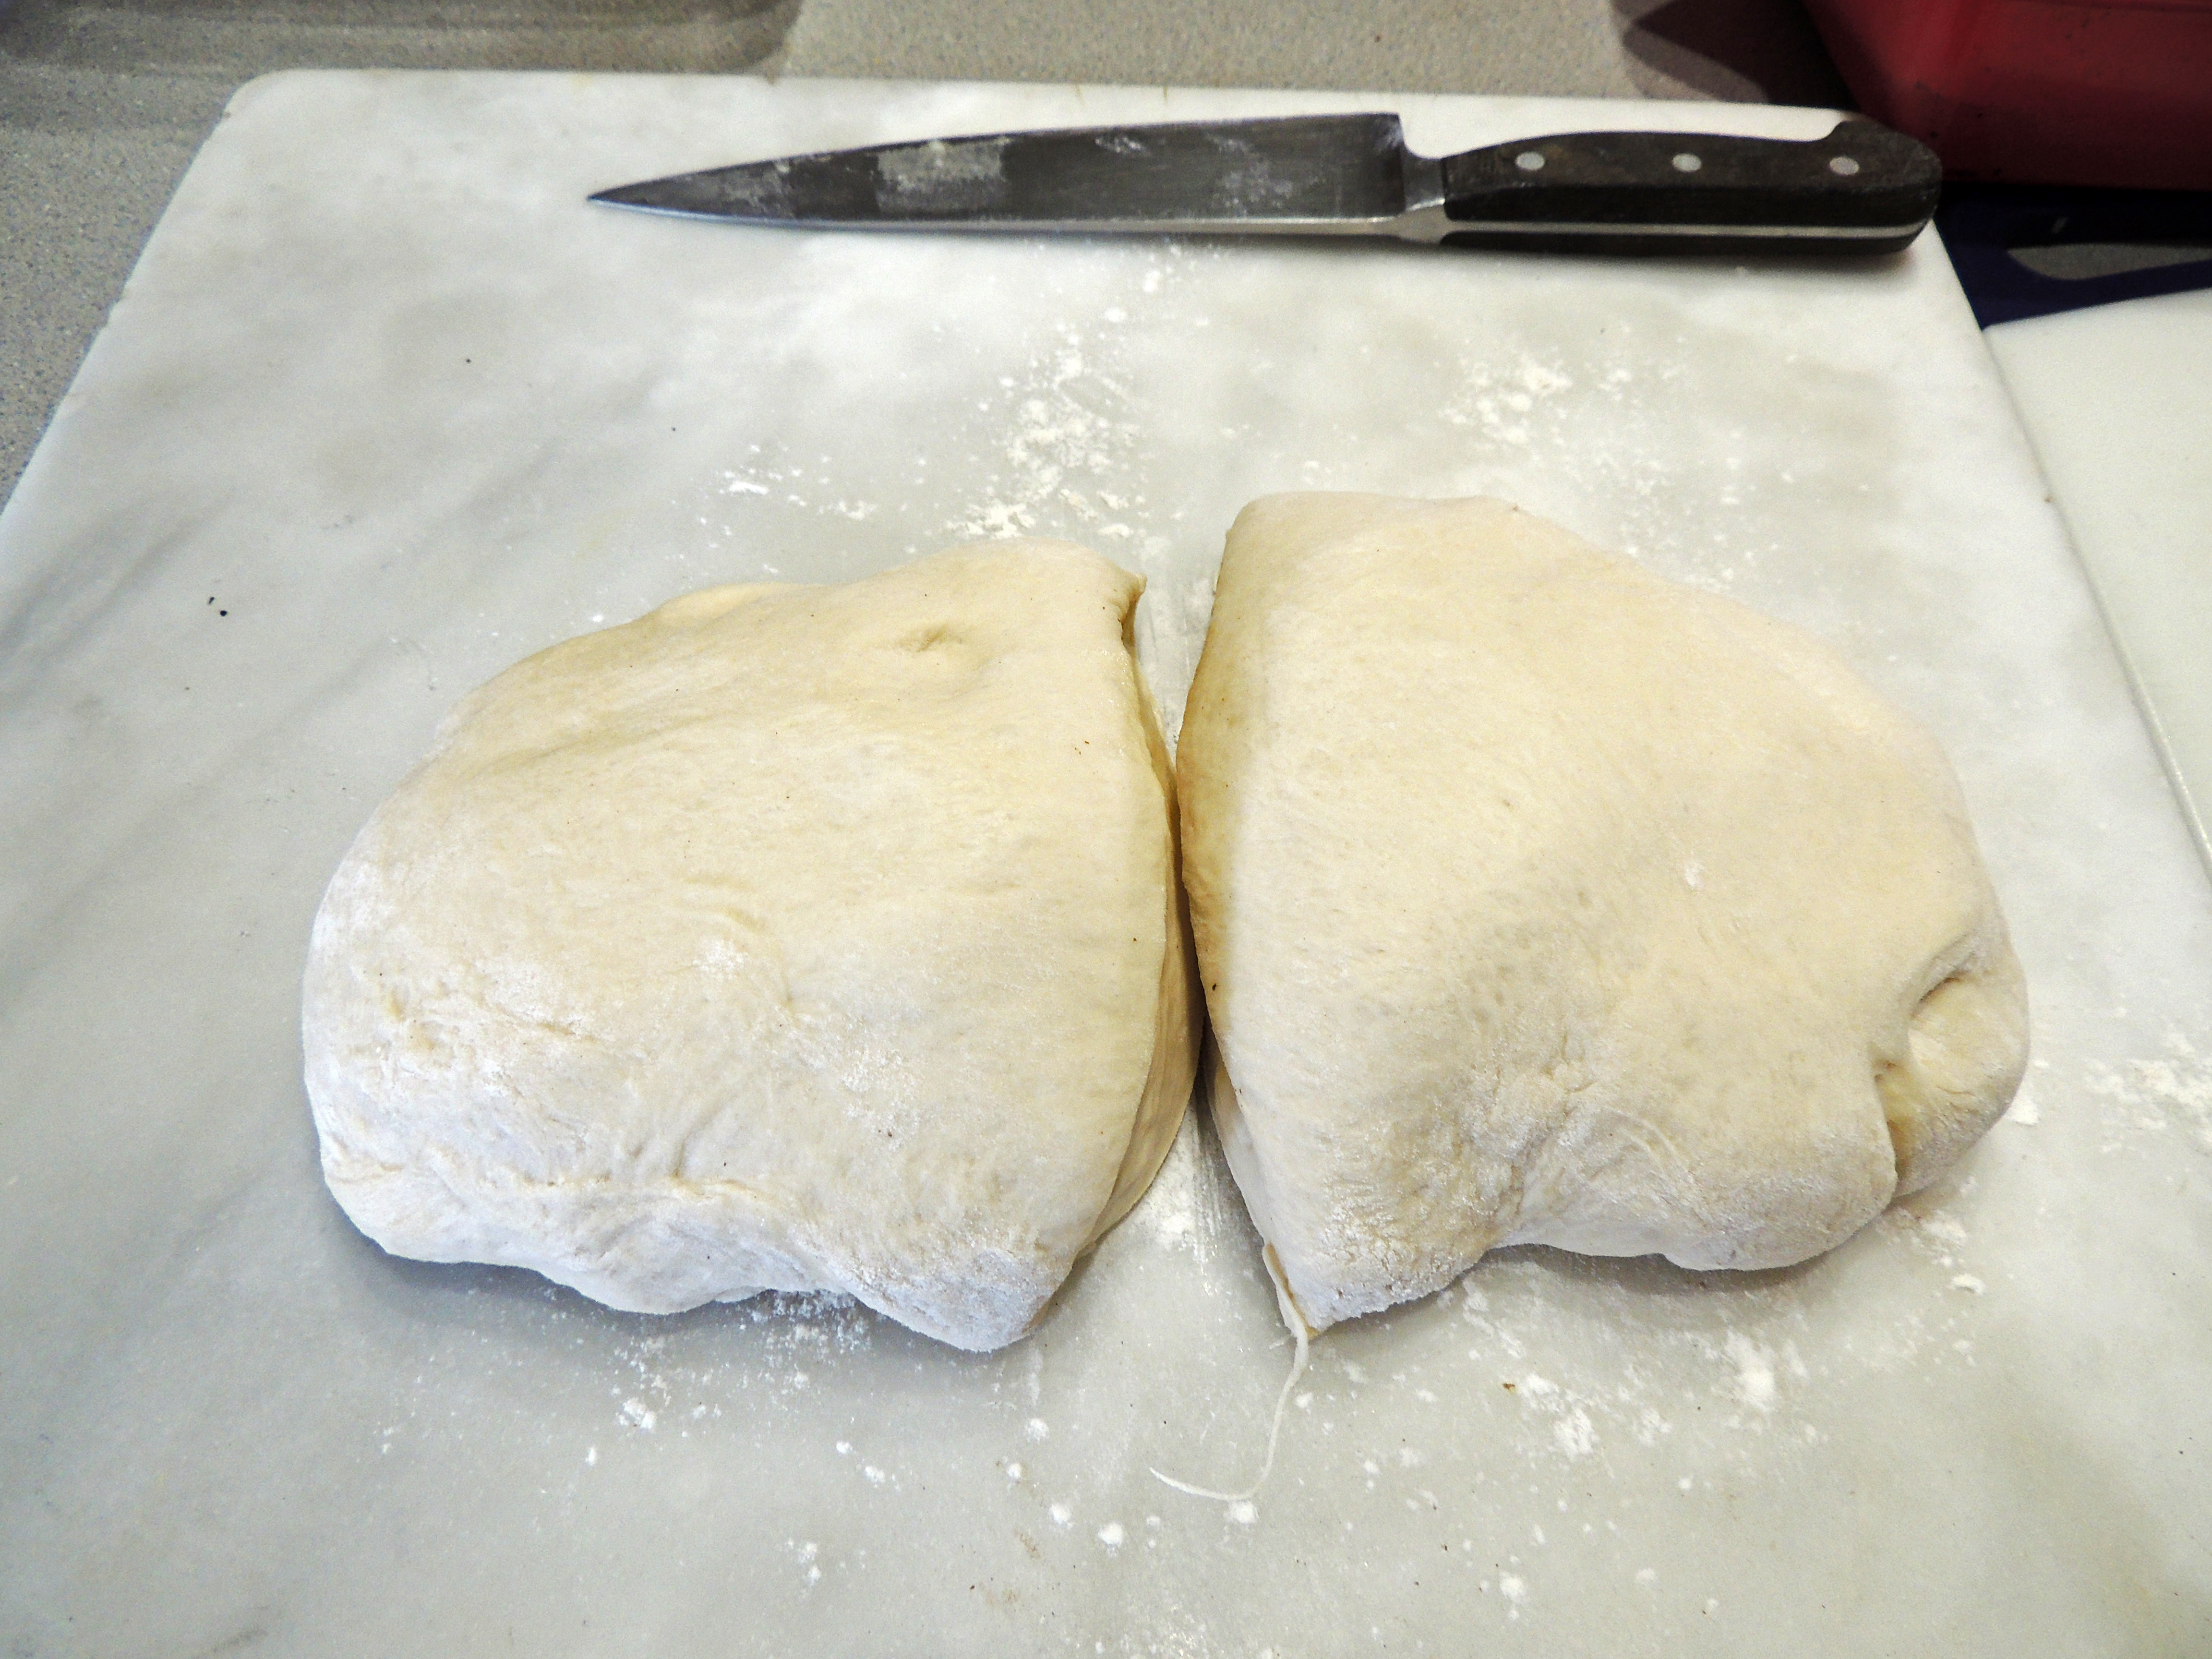
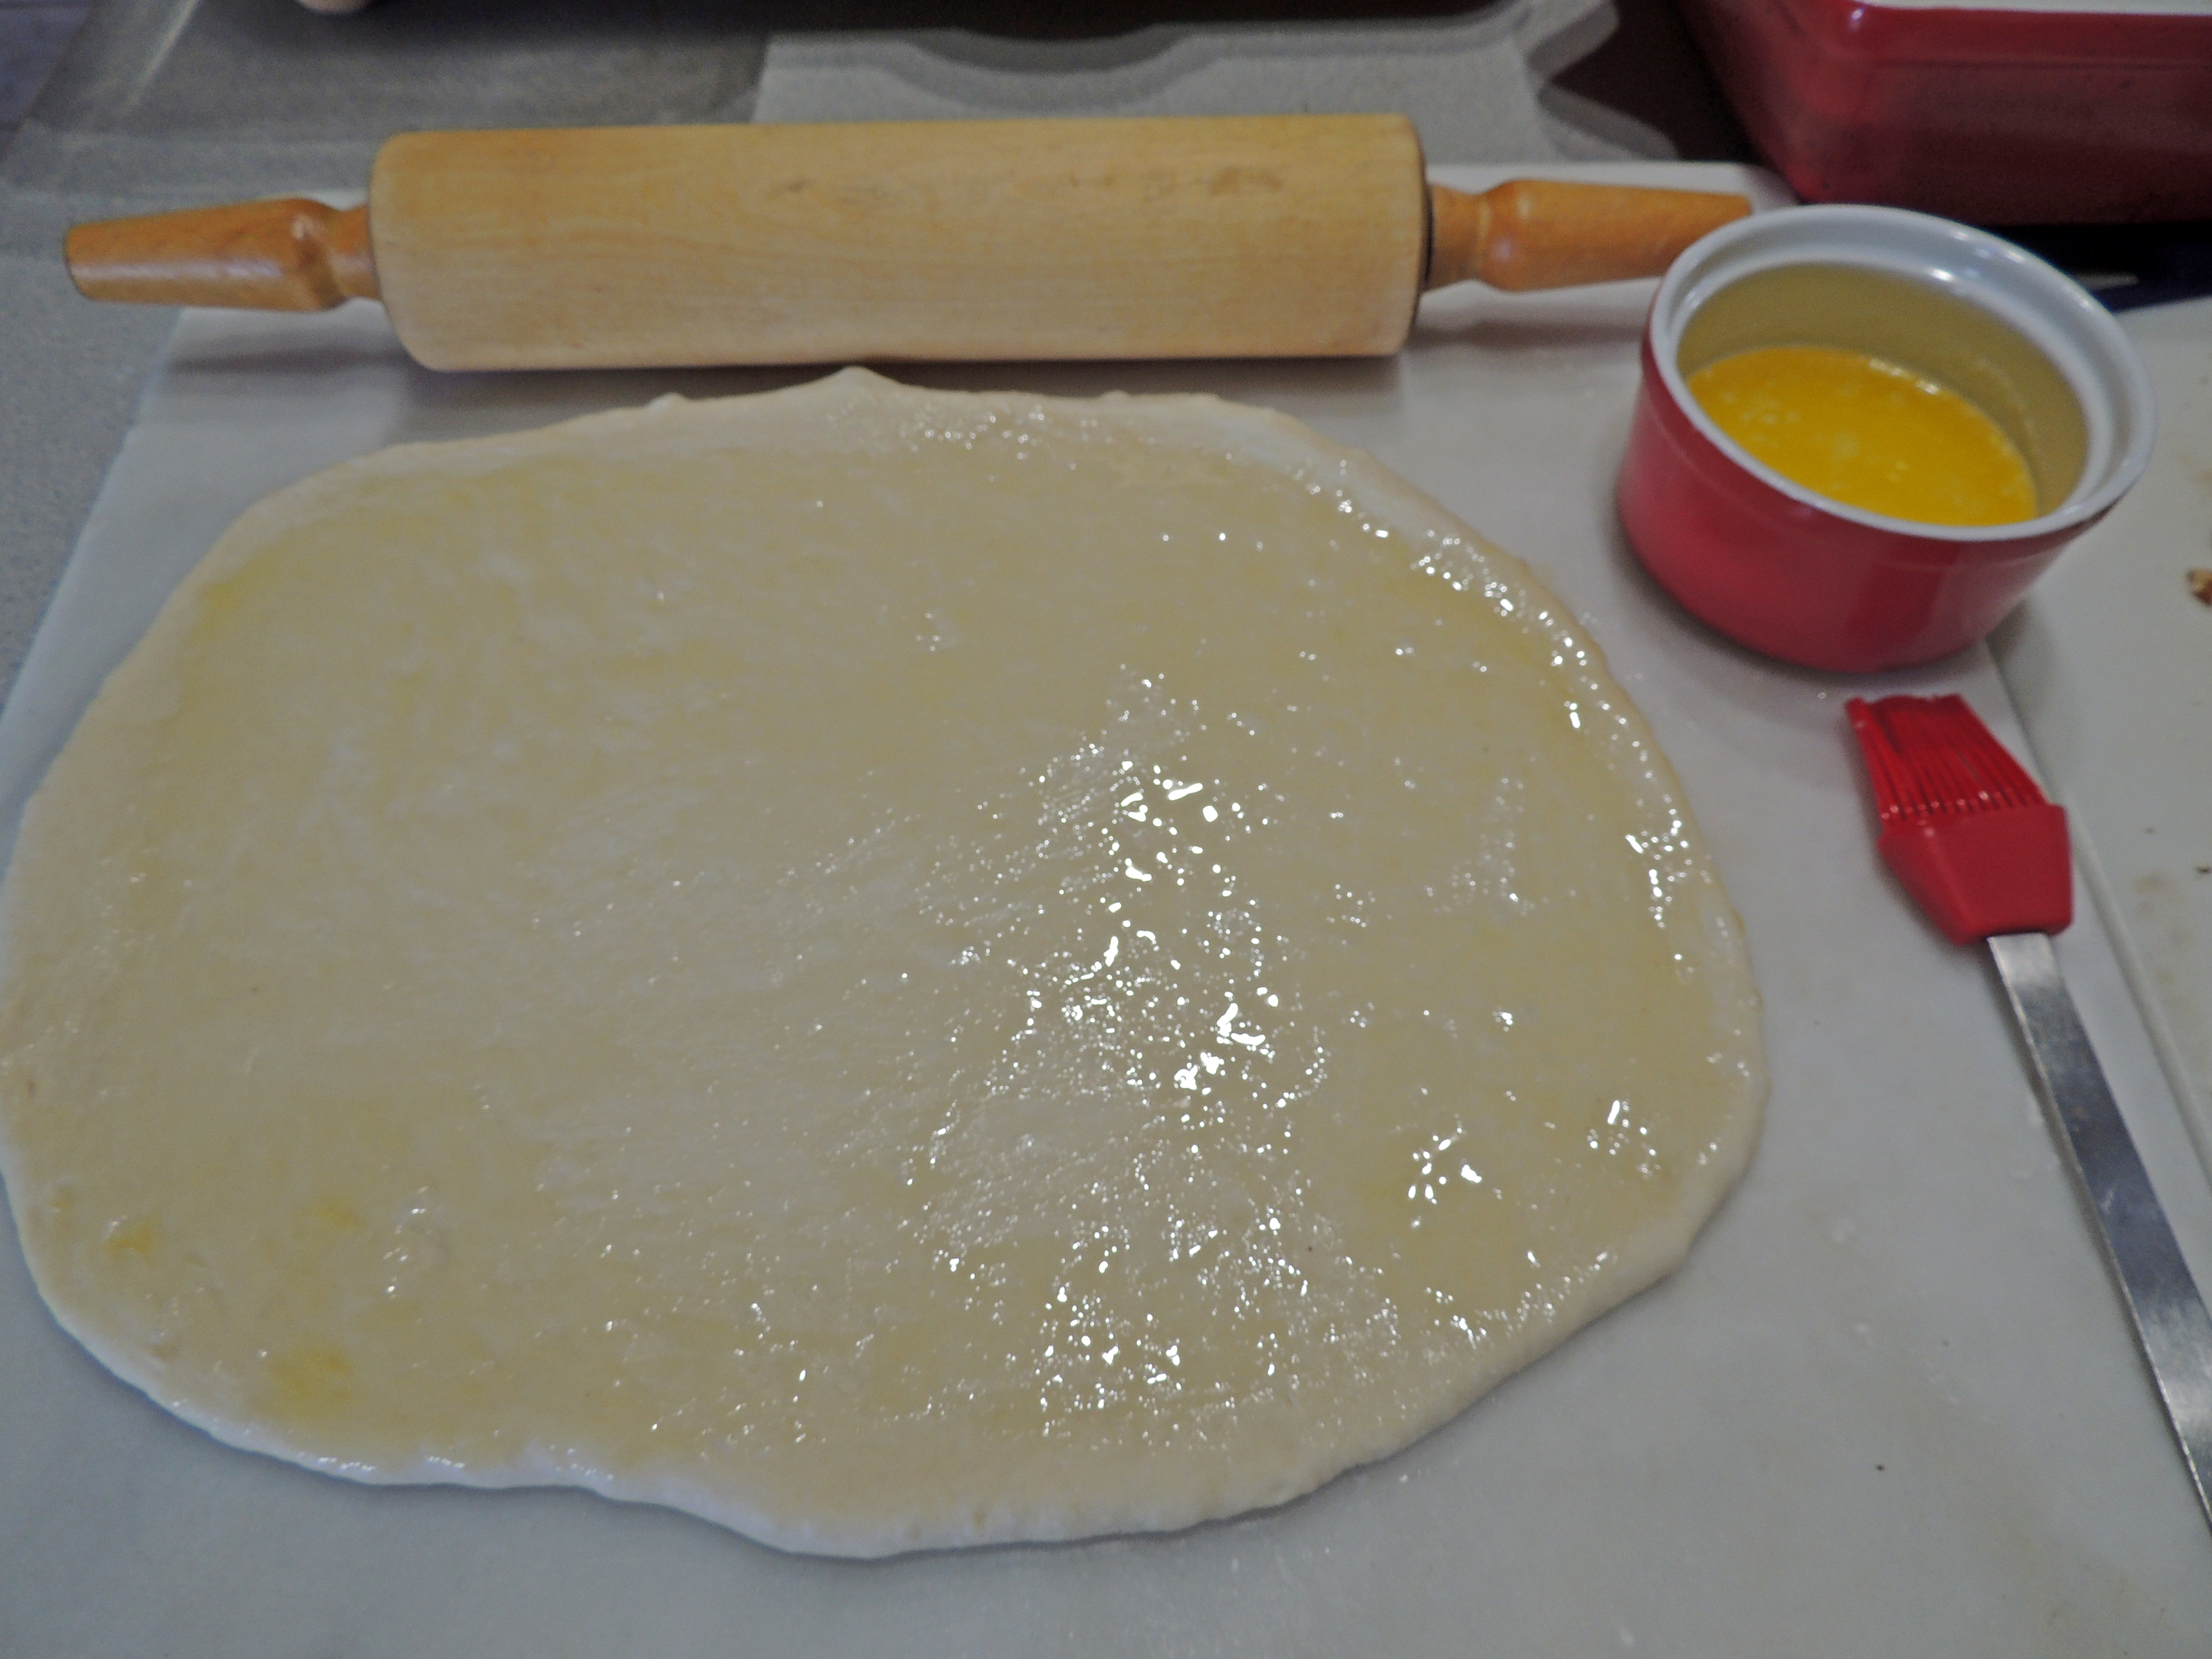
After letting the dough rise in a big bowl in a barely warm oven, cut it in half and roll out each half (one at a time).
Spread melted butter on the rolled out dough.
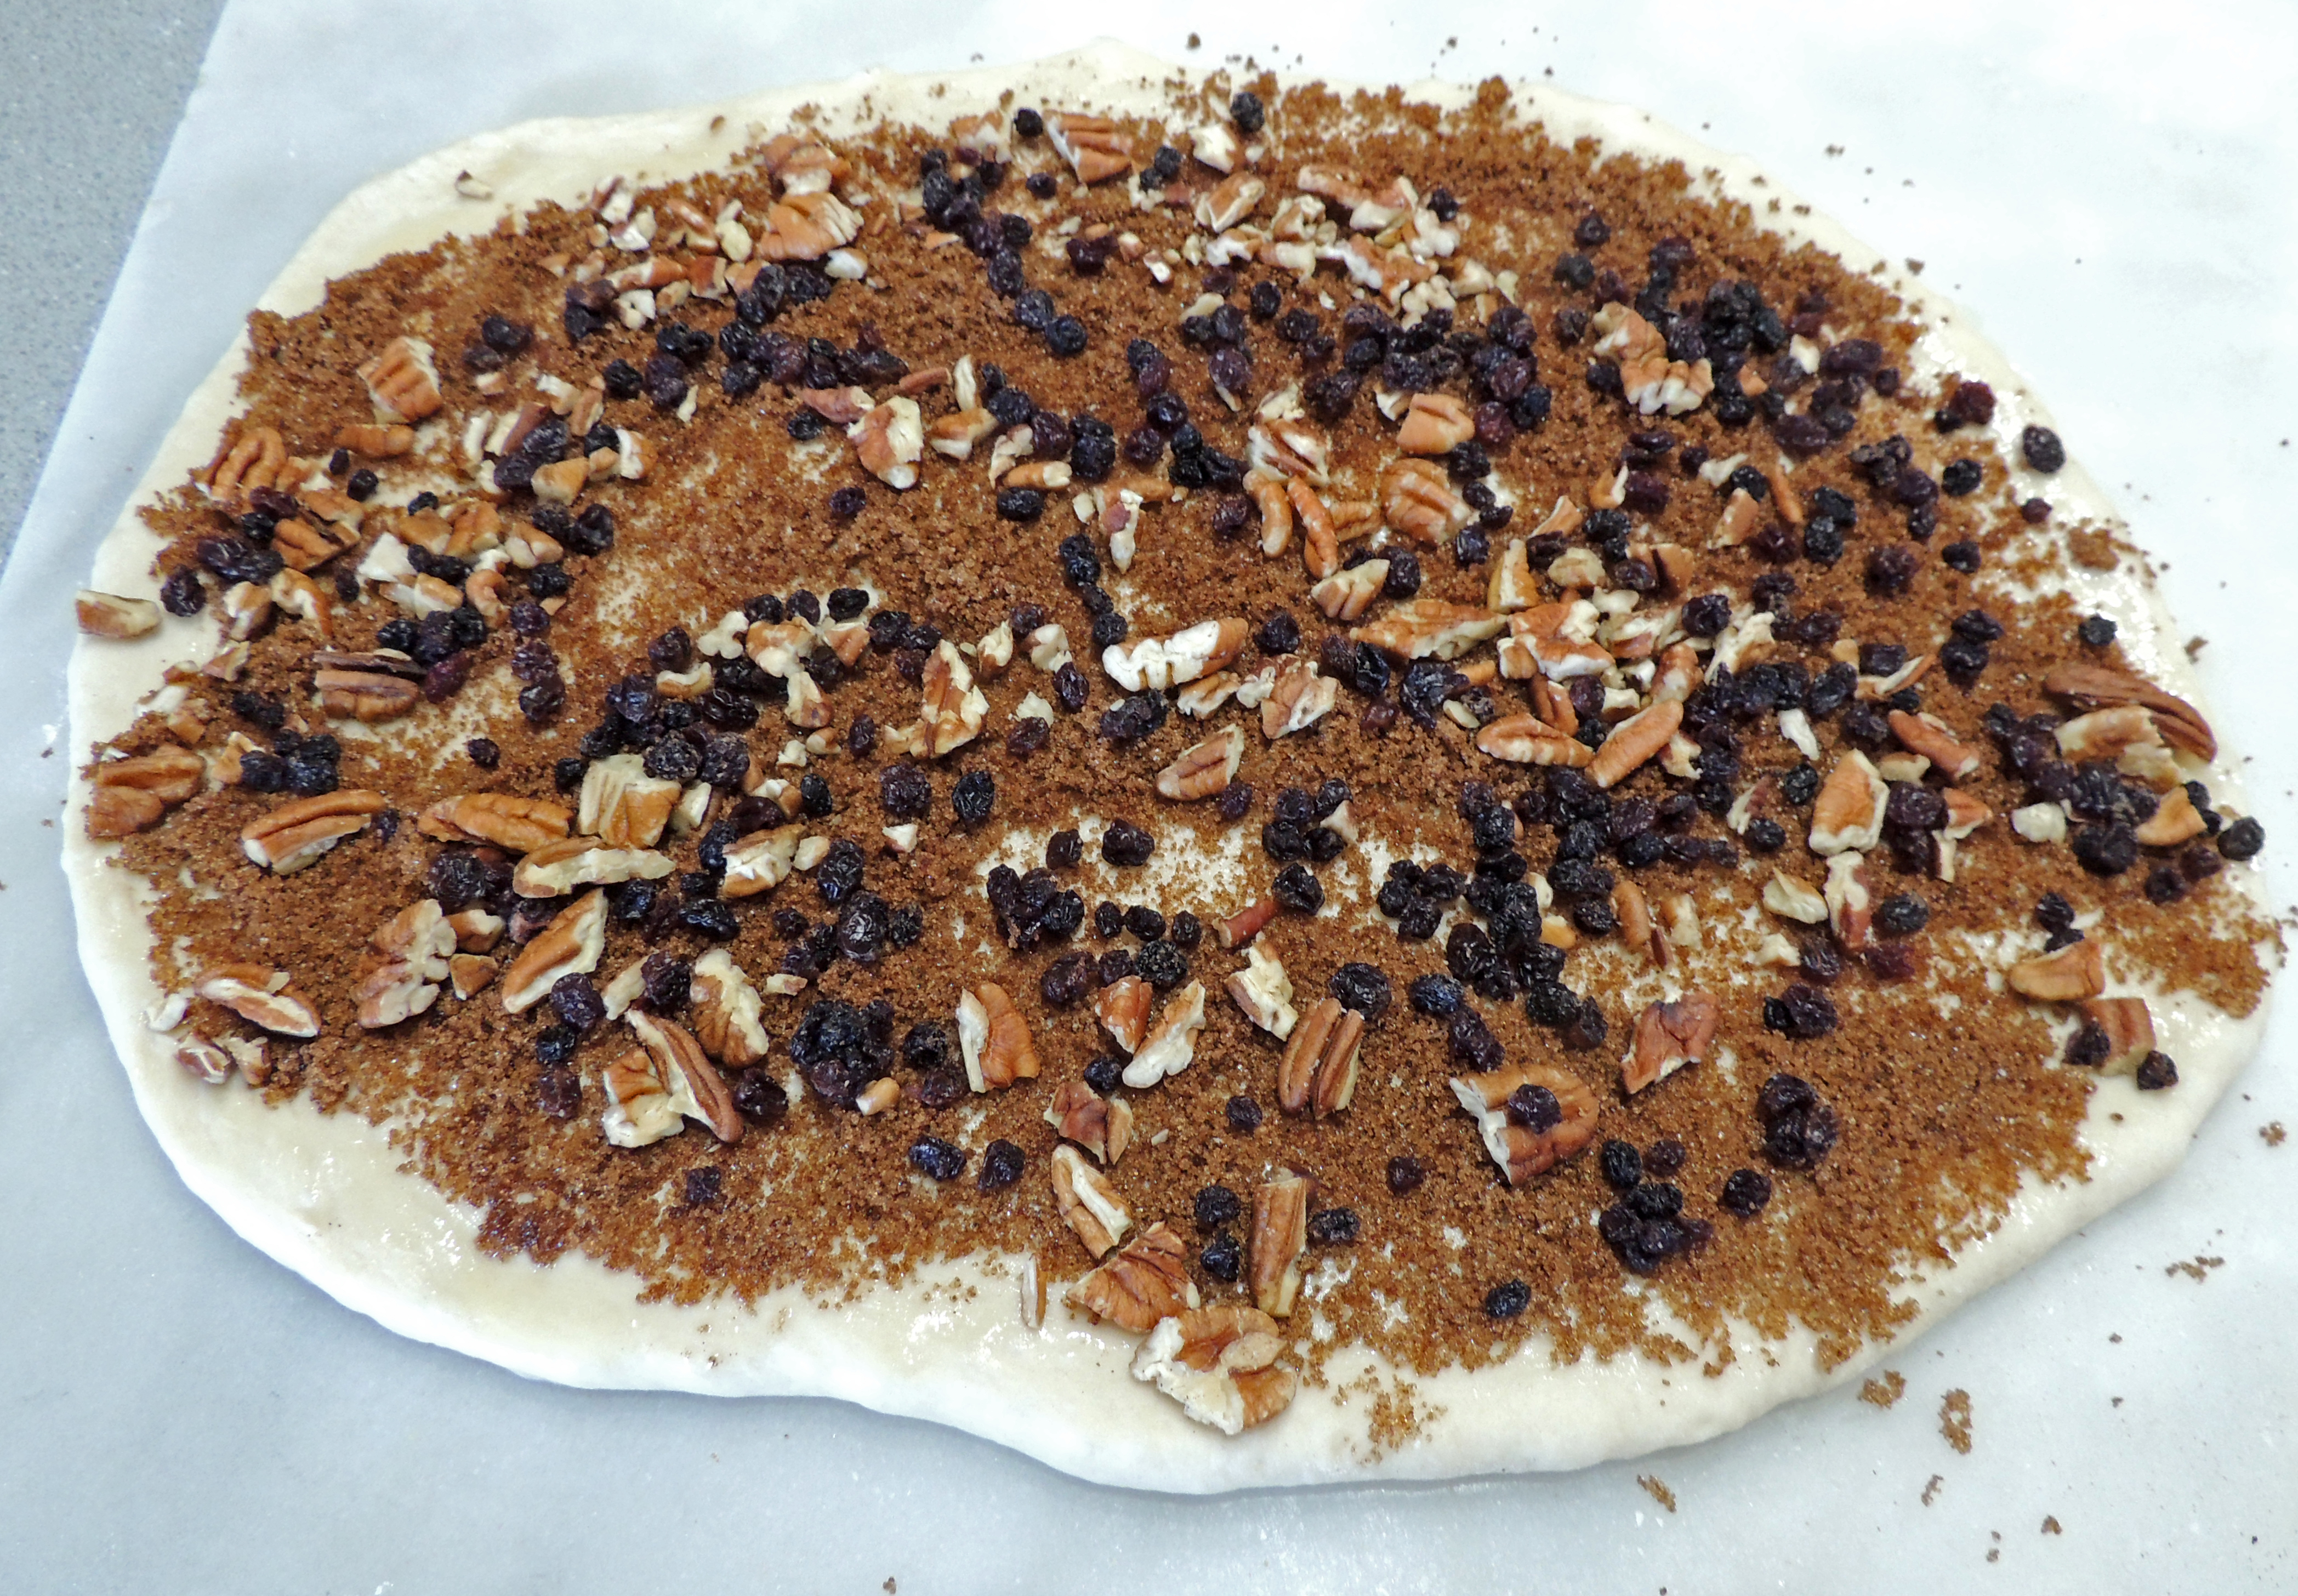
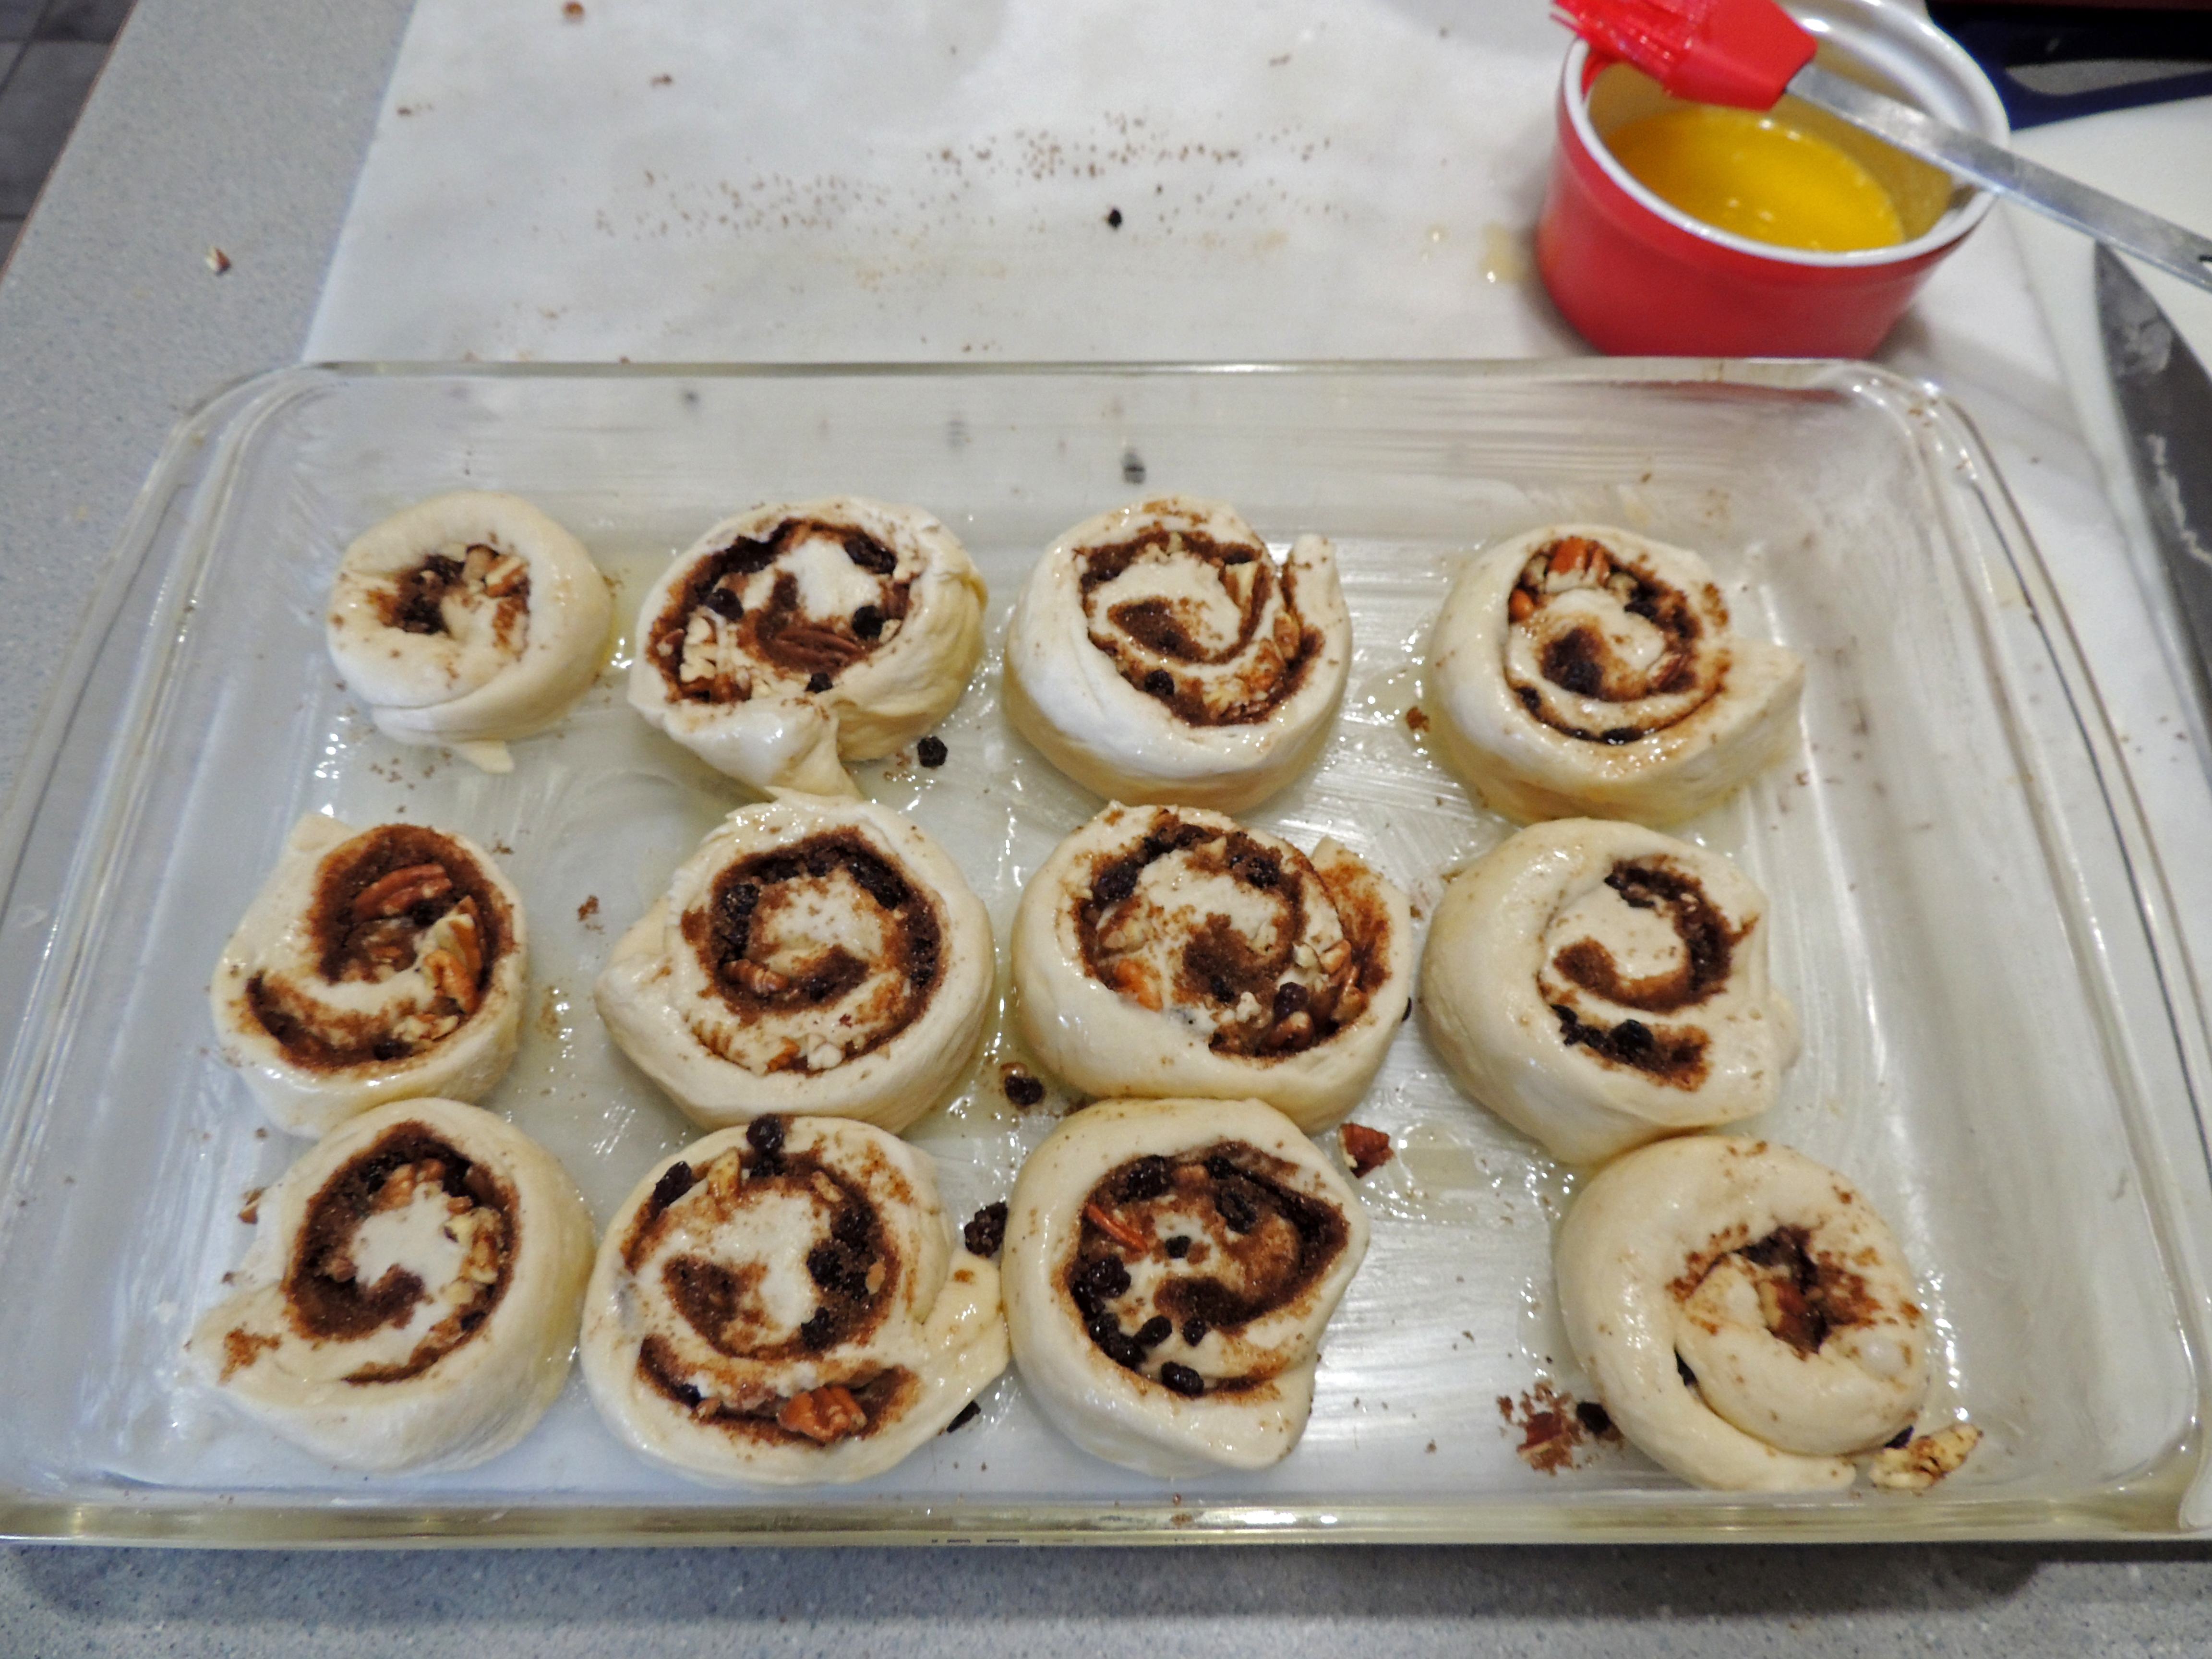
Sprinkle with brown sugar (maybe not as much as what is shown in this photo), cinnamon, currants, and pecans.
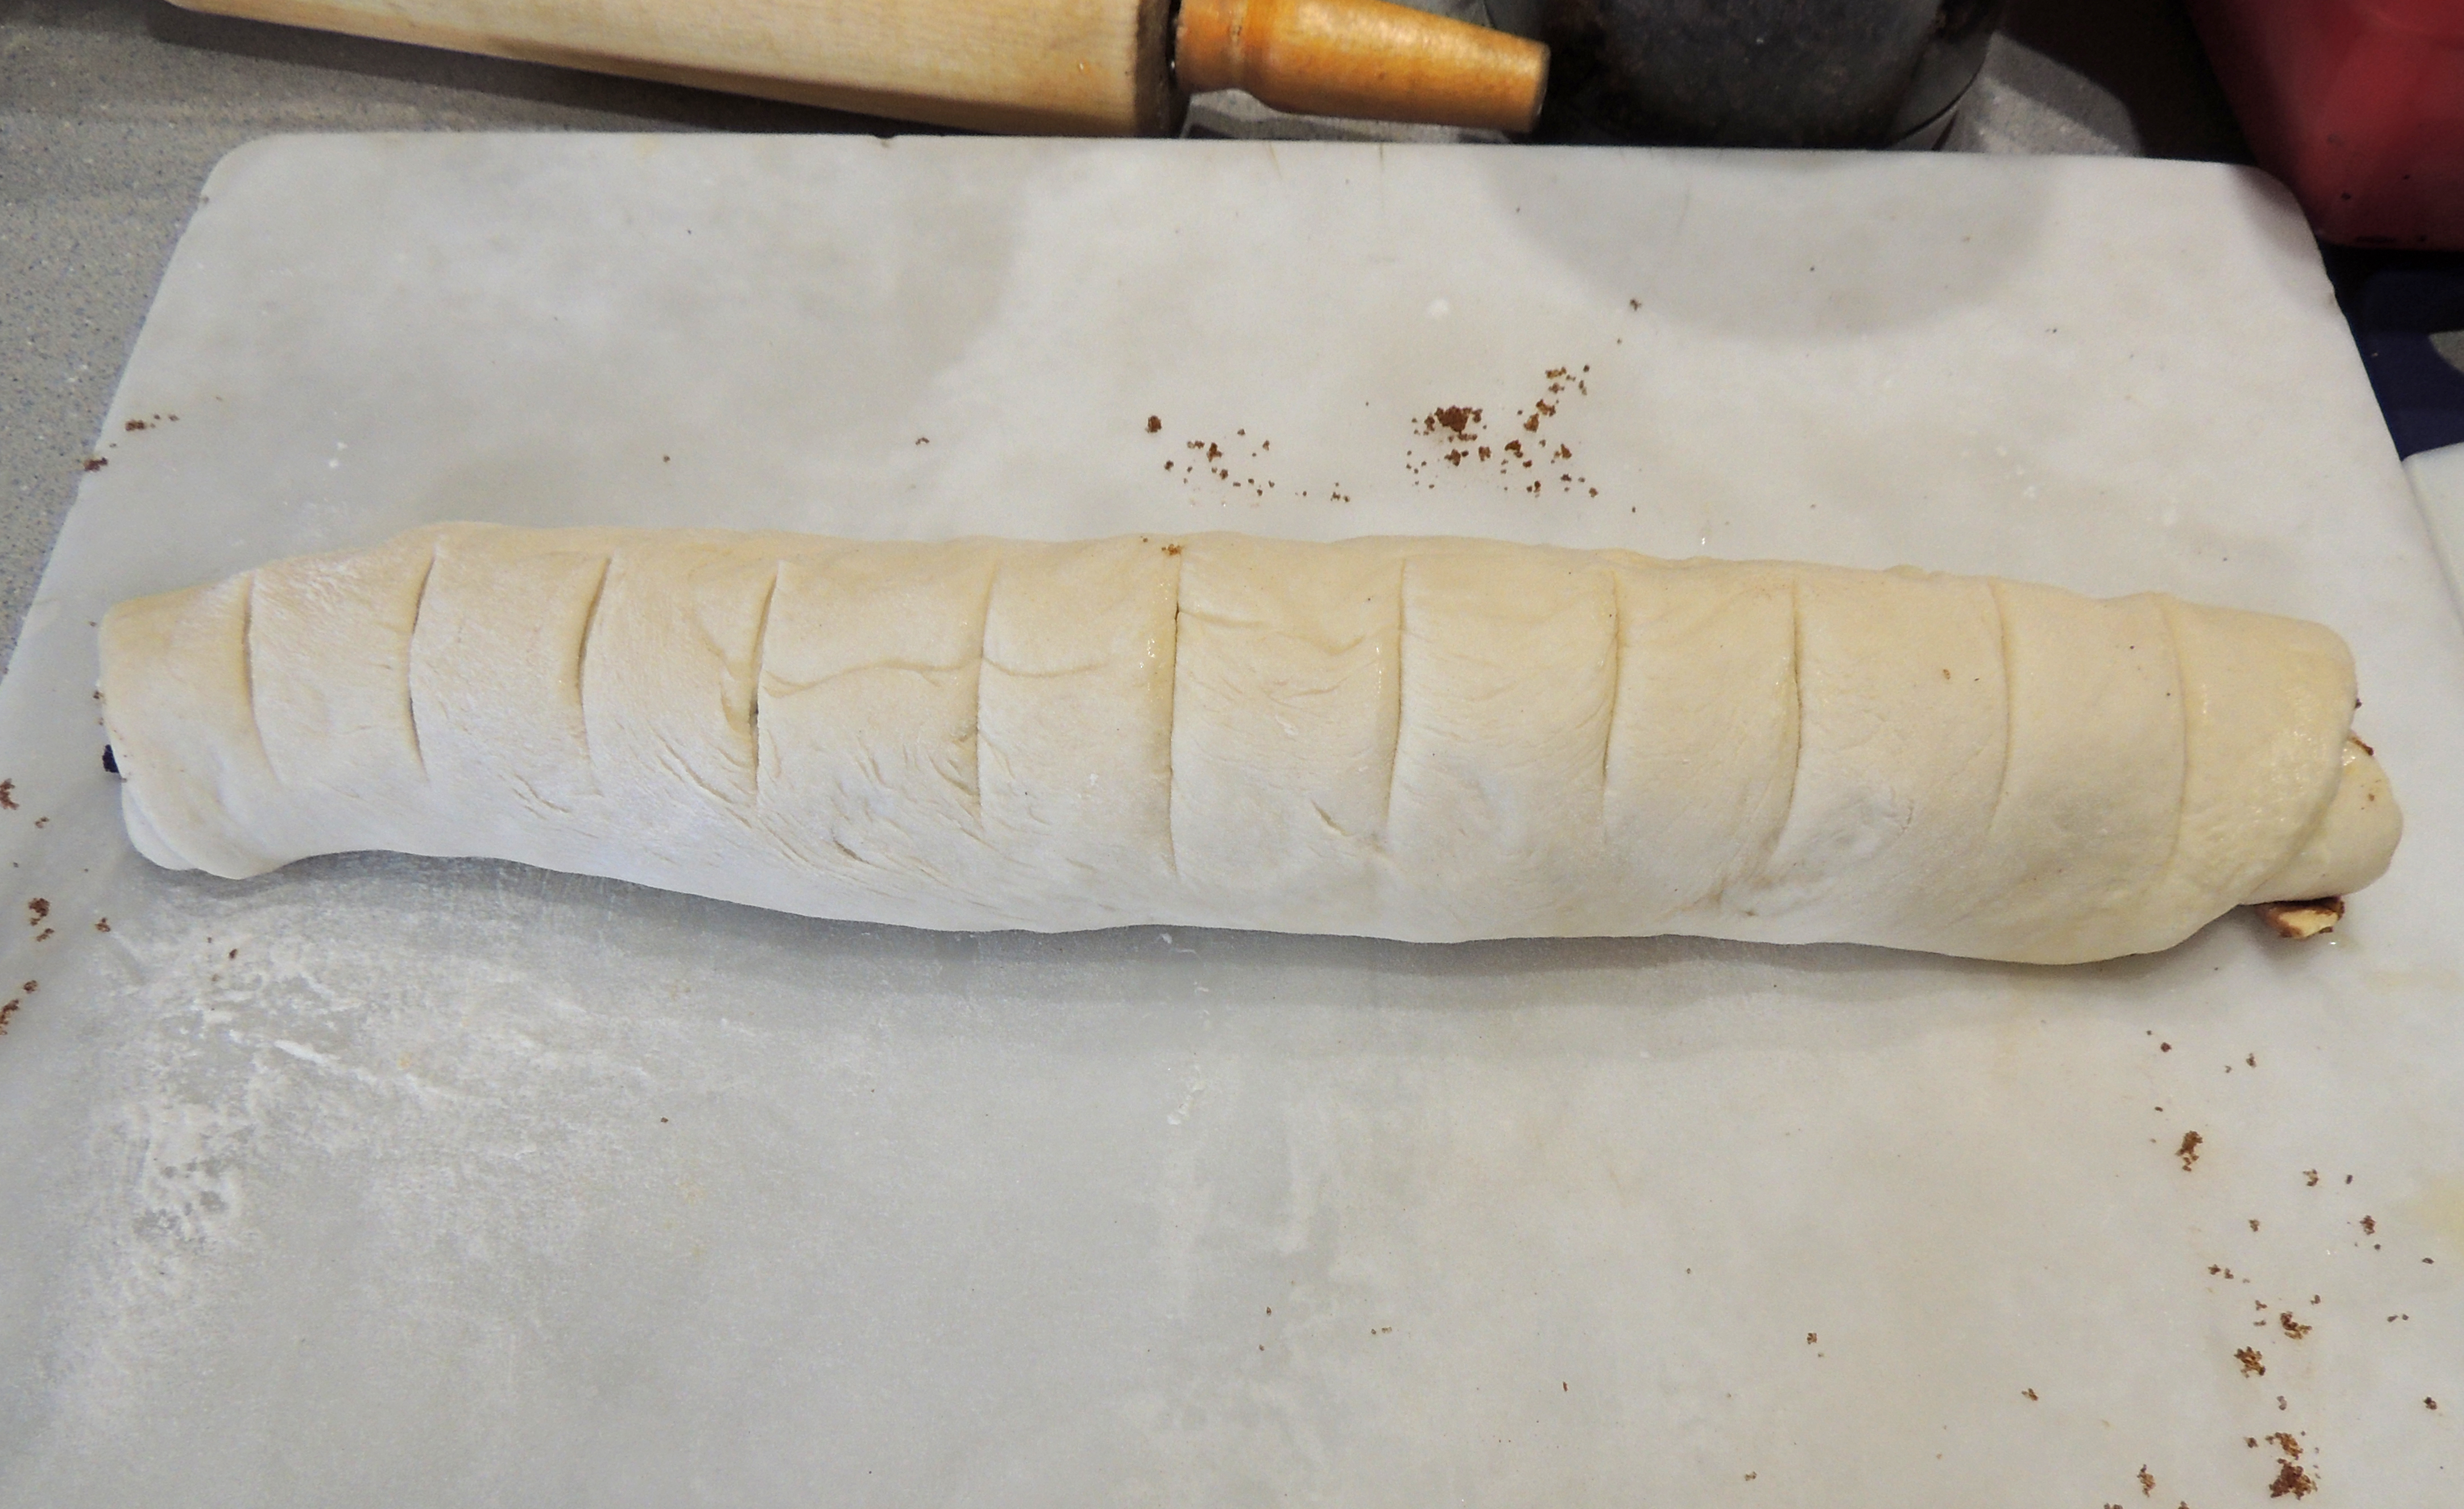
Roll up the dough and cut the roll into 12 pieces. I usually cut it in half, and then cut the halves in half, and then those four pieces are cut into three pieces, making twelve pieces in all.
Butter the 9″ x 13″ baking dishes, especially buttering the sides well, and place the twelve pieces in each dish. They will rise in a warm place and grow together as they rise.
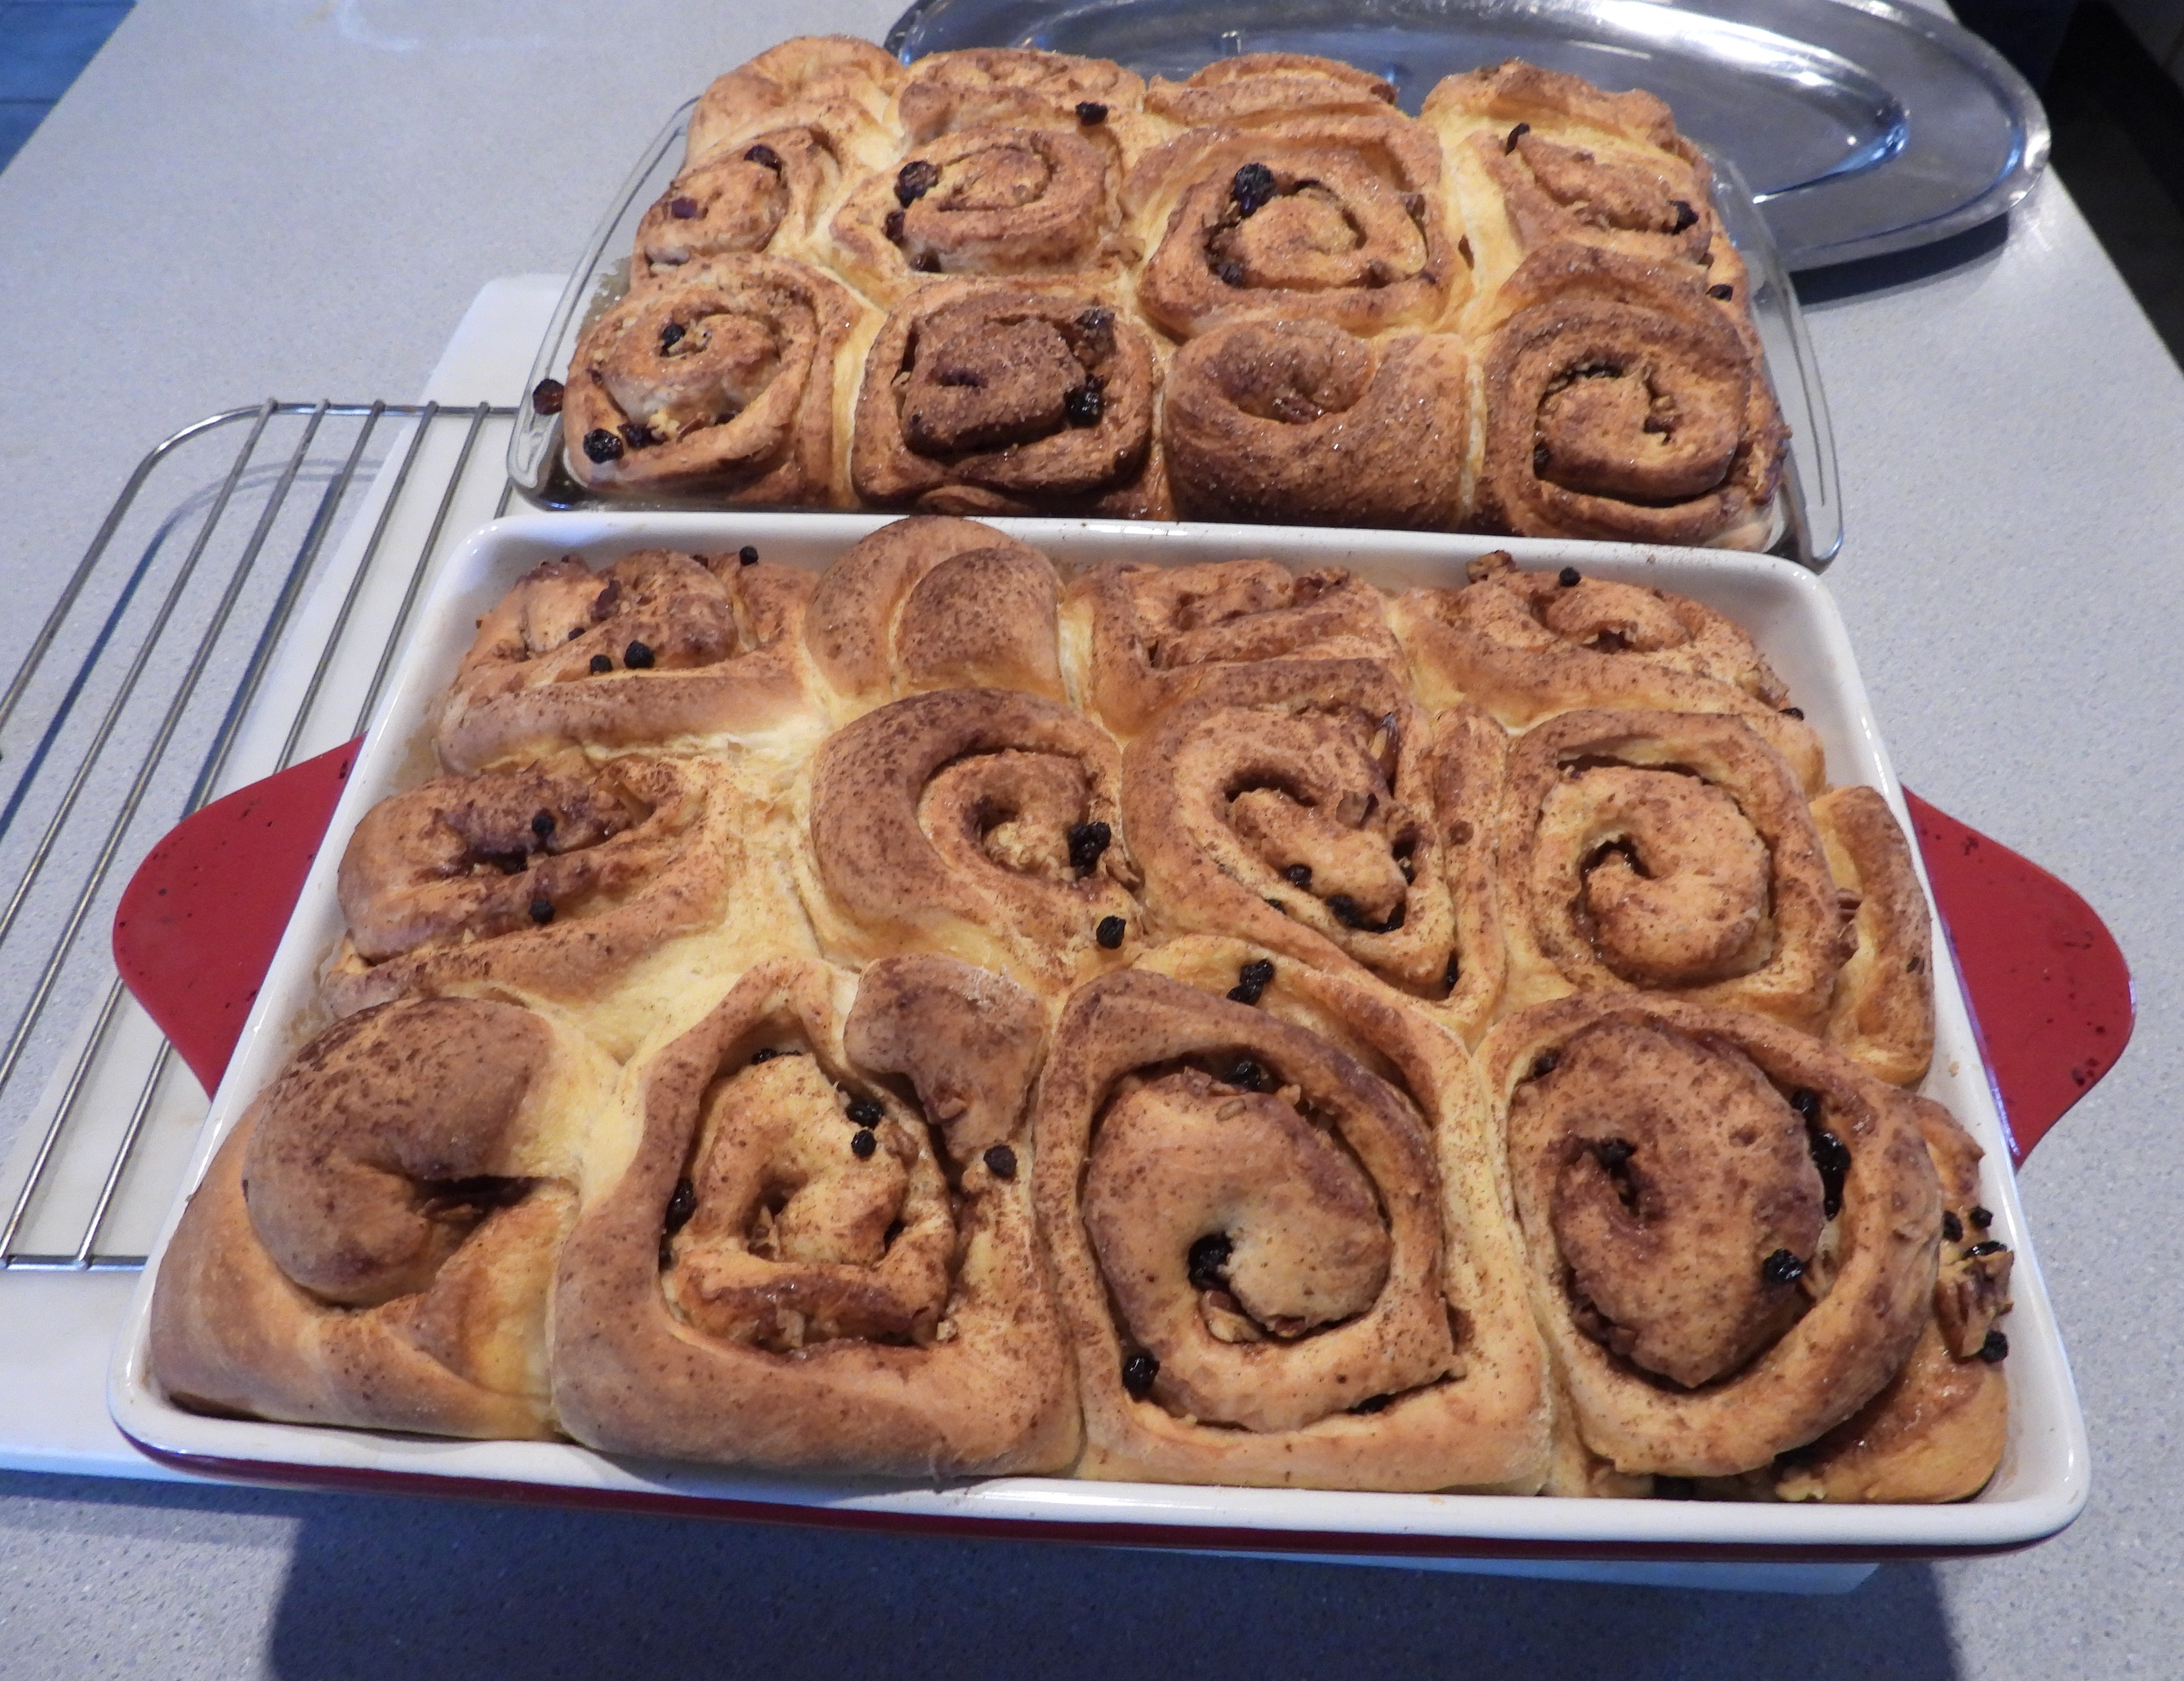
In this photo, I don’t have anything in the bottom of the baking dishes except butter. These will be regular cinnamon buns.
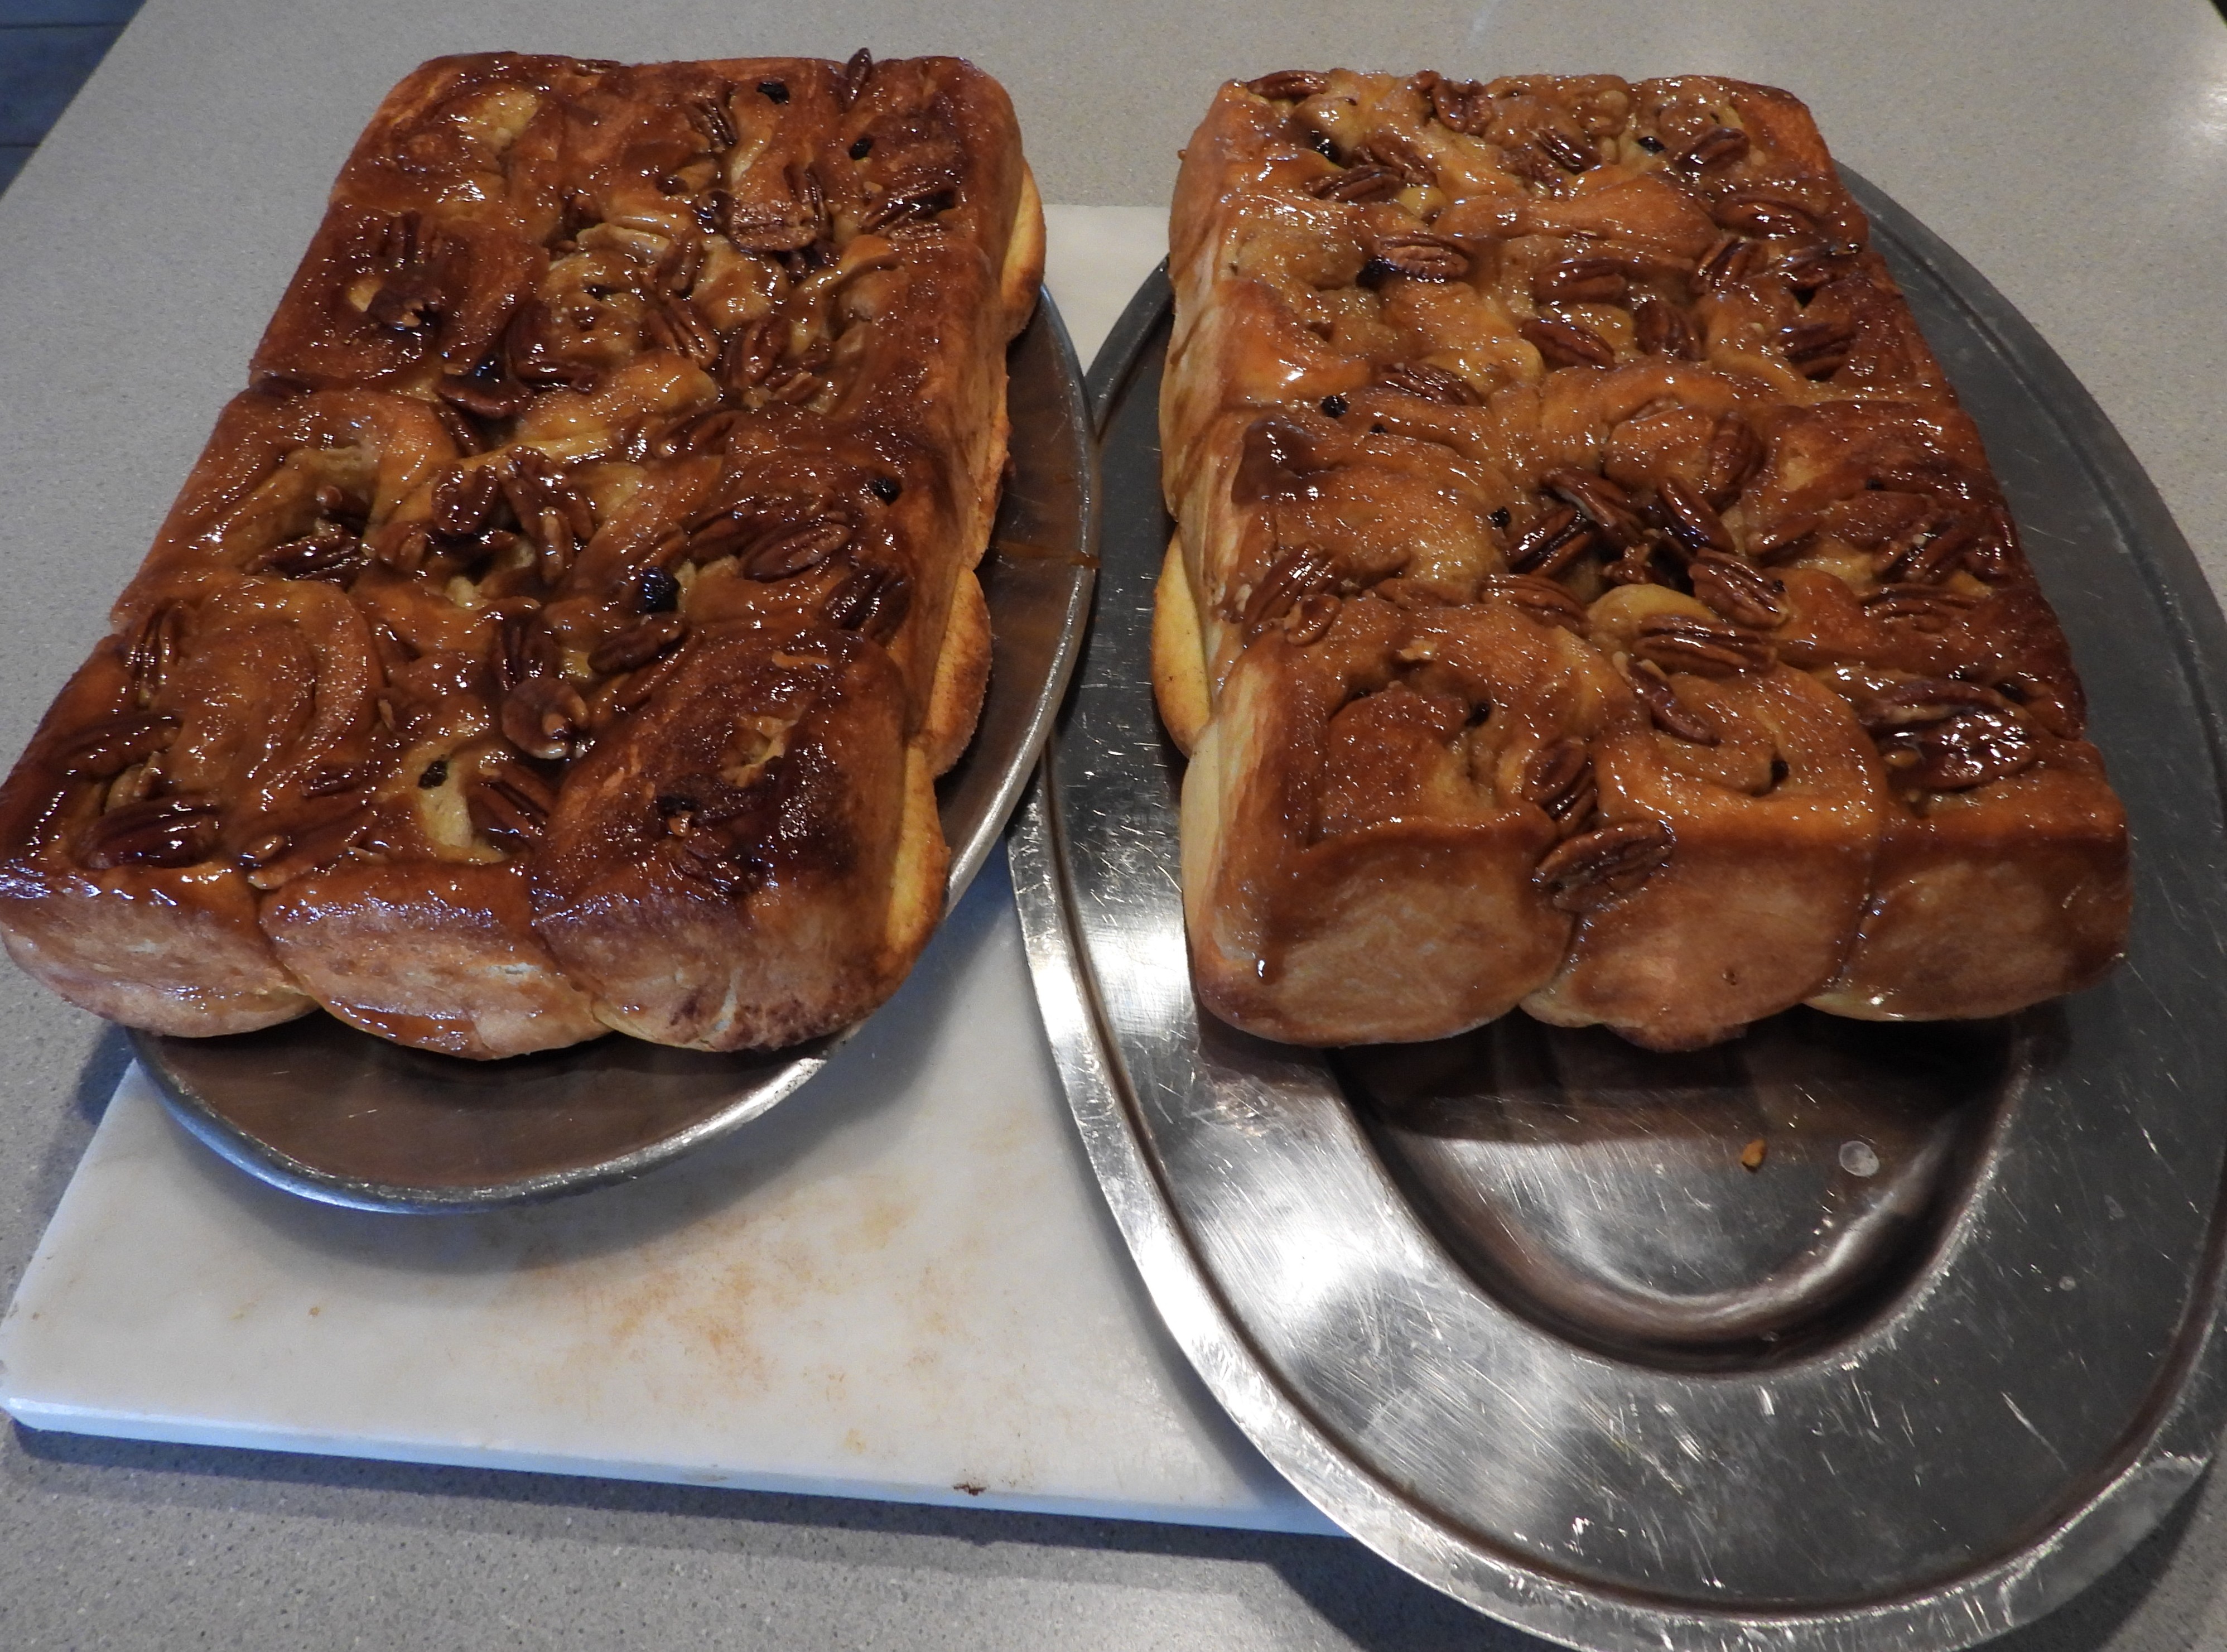
If you want sticky buns, for two baking dishes (two dozen rolls) put 1/2 cup of butter, 1 and 1/3 cups brown sugar, and 1/3 cup water in a saucepan and bring it to a boil for about a minute. Then pour that syrupy mixture into the prepared baking dish and sprinkle some pecan halves in the bottom of the dish before putting the rolled up dough pieces in the dish.
When the buns have risen so they are touching each other, preheat oven and bake at 375 degrees for 35 minutes.
In this batch I put the sticky syrup in the bottom of each dish so when I inverted the buns, they have the melted brown sugar and pecans on the top.
A little tip for inverting the very hot baking dishes — wear oven mitts, and make sure to loosen the sides (why you did the good buttering job). Place a platter over the buns. Flip the whole baking dish with the platter on top so that platter is now on the bottom. Then loosen and remove the baking dish.
The basic dough recipe (for the two pans of cinnamon rolls, I doubled the recipe below, so 4 cups of milk, 4 tbsp. butter, etc.):
2 cups of lukewarm milk
2 tbsp. butter
2 tbsp. honey (or sugar)
2 tsp. salt
1 egg (if you want it)
5 cups flour (adjust as needed)
2 tsp. fast acting (instant) yeast
*****
What I do:
I pour the milk into a big measuring cup and put it in the microwave for two minutes.
Pour the warm milk into the bread pan in the bread machine (if you’re using a bread machine on the dough setting) or into the bowl of your Kitchen Aid mixer.
- I just remembered that in a bread machine you might only be able to do a single batch of dough. In the mixer, or by hand, you can double the recipe.
Add the butter, salt, and honey.
Then, add some of the flour. I added a couple of cups of flour and then added an egg or two if doubling (the flour having cooled the mixture a little so I don’t end up with bits of cooked egg). Then I add the instant yeast and the rest of the flour.
Mix and knead as necessary. Put into a big bowl in a barely warm oven to rise.
*****